The UMD Terp Theme Includes 5 different layouts, called “Content types”, for creating a page.
- UMD Terp Homepage: The Homepage layout has special features designed for a site’s home or landing page, but can be used on internal pages where projects or initiatives would benefit from a similar layout to a site’s homepage. This layout can also be used to showcase the work of teams or units that exist within the larger organization.
- UMD Terp Article: The Article layout is great for any number of publications one might find on a university site like official statements, news articles, blog posts, or general updates.
- UMD Terp Event: The UMD Terp Event layout is great for events local to your organization that are not on the main UMD Calendar.
- UMD Terp Person: The Person layout provides space to share or promote important information for individuals in your school, department or unit, and is useful for faculty, or staff directories.
- UMD Terp Basic Page: The Basic Page layout is the catch all layout for any other internal pages of a site (for example: about page, resources, projects, initiatives, etc).
Creating a New Page
- Verify you are logged in or follow instructions to login and access your drupal site.
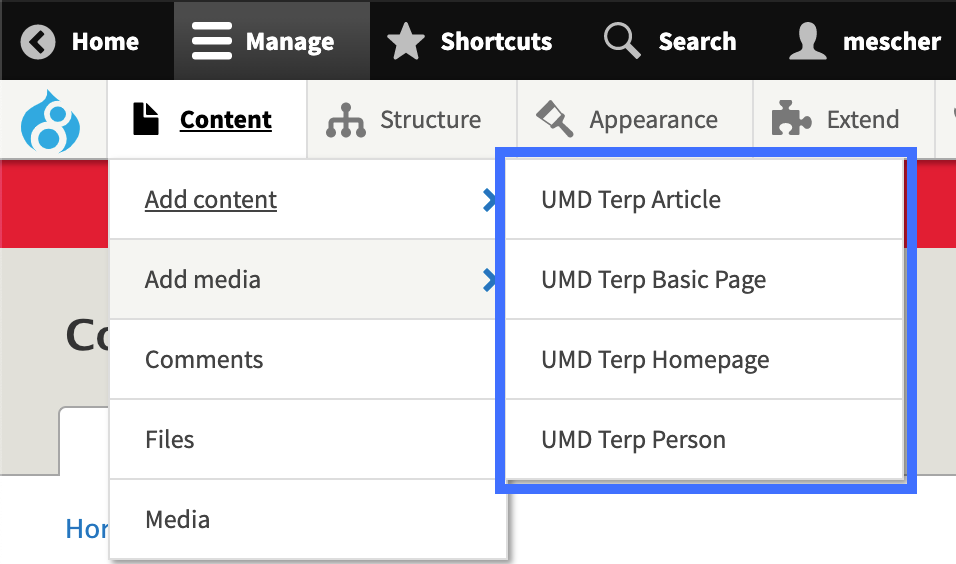
- From the Admin Toolbar Click: Manage, then navigate to: Content > Add content
- Select the desired layout for the page you want to create (Homepage, Article, Event, Person, or Basic Page).
- Add any desired content and widgets to the page.
- Save your new page by clicking the “Save” button at the bottom of the page.
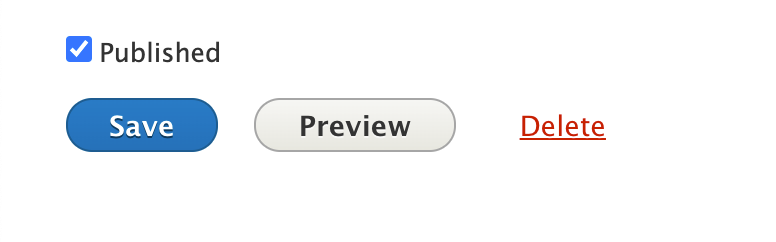
- Published/Unpublished: Unchecking the “Published” option before saving any changes you make will remove the page from public view. The page will only be accessible if you are logged into the site. This is useful if you are building a page, and want to save your changes before it’s ready for public view.
- Unsaved content Warning: Closing or reloading the page before saving any changes made to the page will cause the page to revert back to their previous state.
Editing an Existing Page
Option 1: from the Admin panels
These steps can be used to start editing published and unpublished content
- Verify you are logged in or follow instructions to login and access your Drupal site.
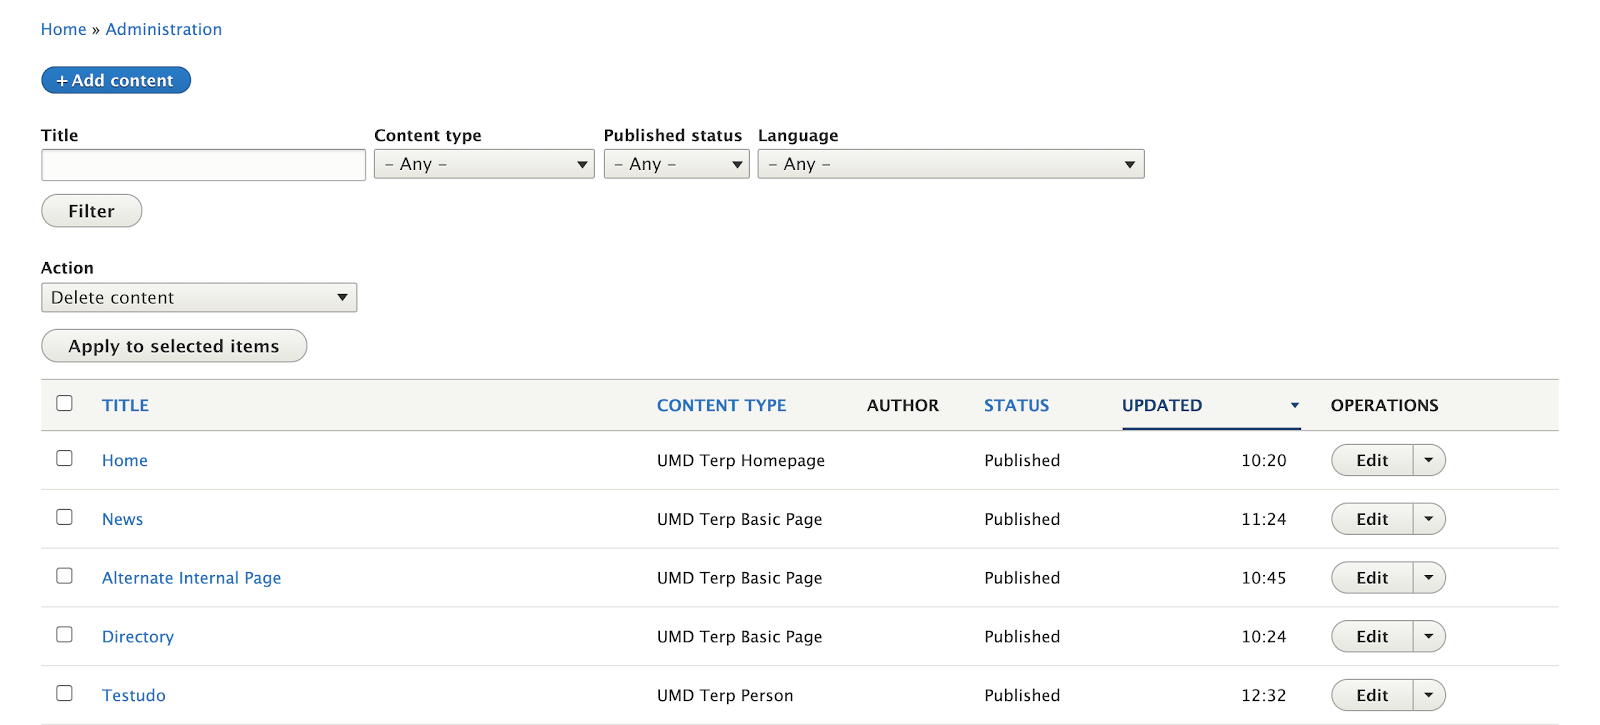
- From the Admin Toolbar: Click Manage, then click Content.
- Locate the page that you want to edit in the list of content.
- Pages are listed in order of the date they were last modified or created, but to make things easier to find, you can filter content based on Title, Content Type, published Status, and language using the filter options above the list of content.
- Pages are listed in order of the date they were last modified or created, but to make things easier to find, you can filter content based on Title, Content Type, published Status, and language using the filter options above the list of content.
- Once the page is located, click the “Edit” button on the right side in the same row as the page’s title. Clicking the title: Clicking the page title will let you to view the page before editing it, then following instructions in Option 2: From the Page View, to make edits to the page.

- You should now be able to edit the page, by adding/editing content and widgets.
- Save your changes by clicking the “Save” button at the bottom of the page.
- Prevent Data Loss: Closing or reloading the page before saving any changes will cause the page to revert back to its previous state.
- Published/Unpublished: Unchecking the “Published” option before saving any changes you make will remove the page from public view. The page will only be accessible if you are logged into the site. This is useful if you are building a page, and want to save your changes before it’s ready for public view.
Option 2: From the page view
These steps are useful if you find it easier to locate a page based on its address instead of searching for it from Drupal’s content list page in the admin panels.
- Verify you are logged in or follow instructions to login and access your Drupal site.
- Once logged in, use your site's main menu or similar navigation to locate the page you want to edit.
- On the page, click the pencil icon near the top of the page, then click “Edit” in the dropdown menu that appears underneath.
- You should now be able to edit the page, by adding/editing content and widgets.>
- Save your changes by clicking the “Save” button at the bottom of the page.
- Prevent Data Loss: Closing or reloading the page before saving any changes made will cause the page to revert back to its previous state.
- Published/Unpublished: Unchecking the “Published” option before saving any changes you make will remove the page from public view. The page will only be accessible if you are logged into the site. This is useful if you are building a page, and want to save your changes before it’s ready for public view.
Adding Pages to the Main Menu
- Follow instructions to start editing an existing page, or to create a new page.
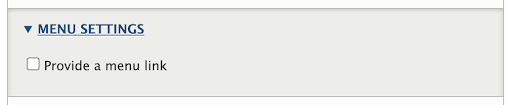
- On the right side of the page you are now editing, look for a box of page settings, and open the item that reads “Menu Settings”.
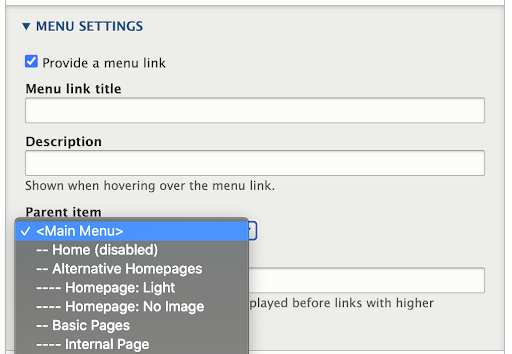
- Click the checkbox next to “Provide a menu link” to add the page to the site’s main navigation.
- Provide a Menu link title, Description, and select whether the page is located on the “<Main Menu>”, or is the sub/child of another page.
- Save your changes by clicking the “Save” button at the bottom of the page.
- Published/Unpublished: Unchecking the “Published” option near the bottom of the page, before saving any changes you make, will remove the page from public view. The page will only be accessible if you are logged into the site. This is useful if you are building a page, and want to save your changes before it’s ready for public view.
- Global Main Menu Settings (Advanced): Menu items can also be added or edited from the site’s Structure settings. These are considered advanced features of Drupal. Learn about Main Menu Options (For Advanced users).
- Managing parent items: A Parent page can have multiple child/sub pages, and a child/sub page, can itself, have child/sub pages (ie: a “Resources” page might be the parent to a “Student Resources” page, which in turn, might be the parent to “Graduate Student Resources” page). Learn more about arranging Main Menu links (For Advanced users).
Adding Content to a page
Each of the 5 layouts offer specific options for adding content to a page, relative to their specific purpose, as well as a common set of “widgets” that all the layouts can use. In computing/web design, a “widget” is a relatively generic term that refers to a thing that provides a specific function or access to a service. In the UMD Terp Templates, these widgets can be added to the bottom of any page, and similarly provide specific functionality related to their name. Learn more about Widgets in the UMD Terp Templates.
Adding Images and other media
The layouts that come with these templates, as well as a number of the widgets discussed later in these guidelines offer the option to add images from a site wide media library. With this library, images can be uploaded, managed, and reused where needed.
Selecting Images
- Make sure you have permission to use all of the images on your website, especially with regard to copyright, and university brand guidelines.
- Browse the University of Maryland Photo Collection to download high-resolution images.
- Contact the Office of Strategic Communications to request access to additional campus images.
Optimize images for faster websites
Images on a webpage can usually be significantly smaller than the original file, in terms of dimensions and overall file size. Saving the image at twice the width that appears on the web page is sufficient for any display. Learn more about Image sizing recommendations in the next section.
Resize and Crop Photos
Use an application such as Photoshop (Available for faculty and staff on terpware.umd.edu) or other third party software, like Photo Resizer (https://www.photoresizer.com/), to crop and resize each image.
Compress Images to Create a Smaller File Size
Use an application such as Photoshop (Available for faculty and staff on terpware.umd.edu) or other third party software, like TinyPNG (https://tinypng.com/), to compress the file size of each image. Then export/download the compressed image(s) to your computer.
For example, most social media platforms require an image's file size be no more than 5mb when used in "Social Media Cards". Learn more about sizing your images for social media cards in metatag guidelines.
Image Sizing Recommendations
Terms
- Dimensions: The actual pixel size of the image. Shown in Width x Height. Many images require a large image for high quality display, but this should be optimized so the file size does not exceed 500KB.
- Aspect ratio: The relationship of the width and height of the image. Some images do not have a set aspect ratio in the theme; they get wider or taller depending on the screen size. Other images keep a consistent aspect ratio on all screen sizes.
- Focal point: where the focus of the photo should be. This is most important for images that do not have a set aspect ratio.
Recommendations organized by site placement
| Widget or Purpose | Dimensions | Aspect Ratio | Focal Point |
|---|---|---|---|
| Homepage hero | 1920x 1080 | Not set; The aspect ratio can change from 1:1 (square) to as wide as 21:9 (ultrawide) depending on the screen size. | Default version: in the center. Background version: on the right. |
| Homepage feature widget (block of color with text, next to or below an image) | Default version: 1920 x 1280 Background version: 1920 x 1080 | Not set; flexible depending on screen size. | Default version: in the center. — Background version: on the left or r ight depending on placement of text block. |
| Basic page hero | 1920 x 490 | Not set; flexible depending on screen size. | Centered — Since the aspect ratio is quite flexible, the image can be cut off on both top/bottom and left/right depending on the screen size. |
| Article featured image (Used at the top of an Article page) | 1400 x 700 | 2:1 | Any — Featured images keep the same 2:1 aspect ratio on all screen sizes, so no portion of image will be cut off. |
| Card | 800 x 530 | 3:2 | Any — Card images keep the 3:2 aspect ratio on all screen sizes, so no portion of image will be cut off |
| Carousel | 1600 x 1060 Carousel images are shown large on click. | 3:2 | Any — Carousel images keep the same 3:2 aspect ratio on all screen sizes so no portion of image will be cut off. |
| Image | 1400 x700 | 2:1 | Any — Images use a consistent 2:1 aspect ratio, Portrait images will be cropped to this aspect ratio. |
| Image with Text | at least 1200px wide | Horizontal or square. Image with portrait/vertical aspect ratios will take up too much vertical space on smaller screens or tablets. | Any |
| People | 400 x 400 | Square | Centered-ish. — Important thing is for the face to be visible and not cut off in the photo. People images keep the same square aspect ratio on all screen sizes, so no portion of image will be cut off. |
| Slideshow | 1400 x 790 | 16:9 | Any — Slideshow images keep the same 16:9 aspect ratio on all screen sizes, so no portion of image will be cut off. |
| Open Graph Meta Tag: Image | 1200 x 630 | Not set; flexible depending on screen size. | Centered — Since the aspect ratio is quite flexible, the image can be cut off on both top/bottom and left/right depending on the card size. |
| Homepage video | 1920 x 1080 | 16:9 | Any |
Uploading Images
Once an image is selected and has been optimized for use on the web, it can be added to the site.
- Verify you are logged in or follow instructions to login and access your drupal site.
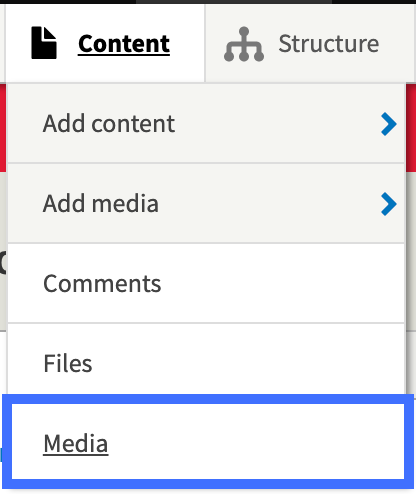
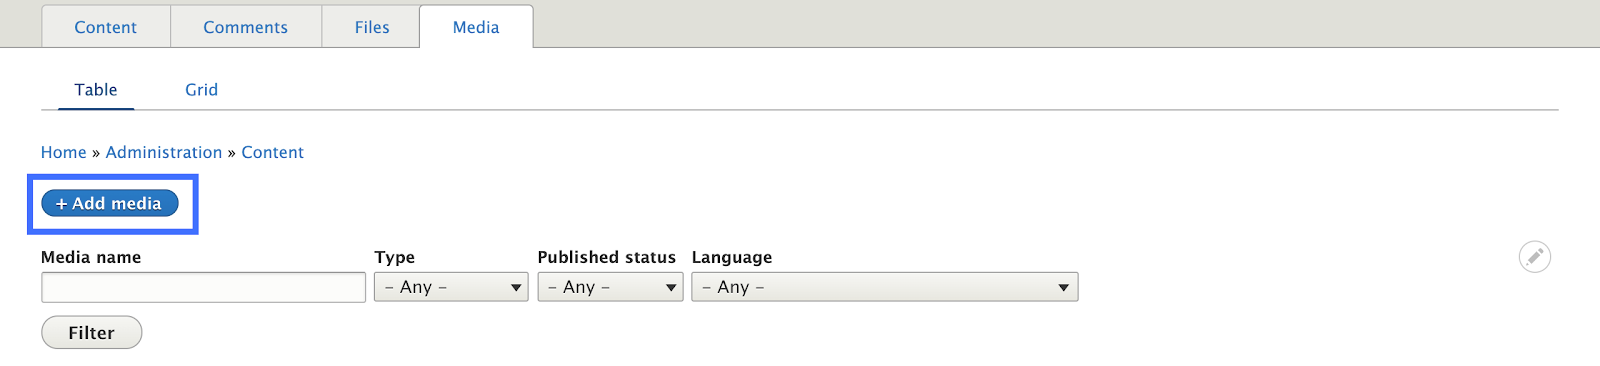
- From the Admin Toolbar: Click “Manage”, then navigate to “Content”, then “Media”.
- Click the “+ Add Media” button at the top of the page.
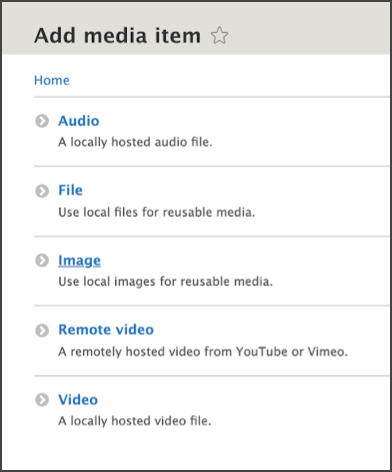
- Select “Image” on the list of media types. For other file formats, see Instructions on uploading other file formats (For Advanced users).
- Click “Choose File” under “Image *” to upload a file from your computer.
- Locate the image you want to upload using your computer’s file browser. Remember the following requirements:
- Number of images: One (1) image file at a time.
- Image file size: 256 MB limit per image file.
- Supported image formats: png, gif, jpg, or jpeg.
- Add “Alternative Text” that accurately describes the content or purpose of the image.
- Limit text to 140 characters or less.
- Provide meaningful and relevant information about the image. (ie: "Hand holding a pencil that is about to erase something on a piece of paper", is short enough, and better than "hand with pencil")
- Avoid the phrases “image of”, or “picture of”. The systems that read alternative text will automatically add that information.

Notice in the above screenshot, that alternative text is required when uploading an image.
- Click the “Save” button at the bottom of the page.
PDFs and other files.
Adding pdfs, and other media are considered an advanced feature in drupal, and are covered later in the guidelines. Learn to Add Files other than Images (For Advanced Users)