In computing or web design, a “widget” usually refers to something that provides a specific function or access to a service. The UMD Terp Templates have widgets that can be added to the bottom of any page. While functionality might overlap, each widget in the templates is designed with a specific purpose.
Adding new widgets to a page
- In order to add widgets to the page, follow the instructions to start editing an existing page, or to create a new page.
- Once in the editor, scroll/swipe to the bottom of the page to find a “Sections” area with a dropdown button that reads “Add Text” and a downward pointing triangle (▾) next to it.
- To add a basic text area to your page click the “Add Text” button. The new text widget is automatically added to the bottom of the page you are editing. Visit the Kitchen Sink for a collection of text styles, formatting options, and recommendations.
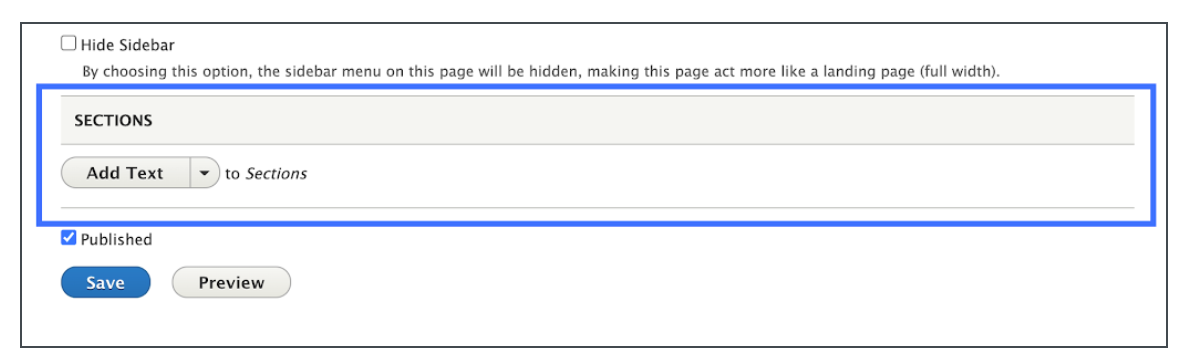
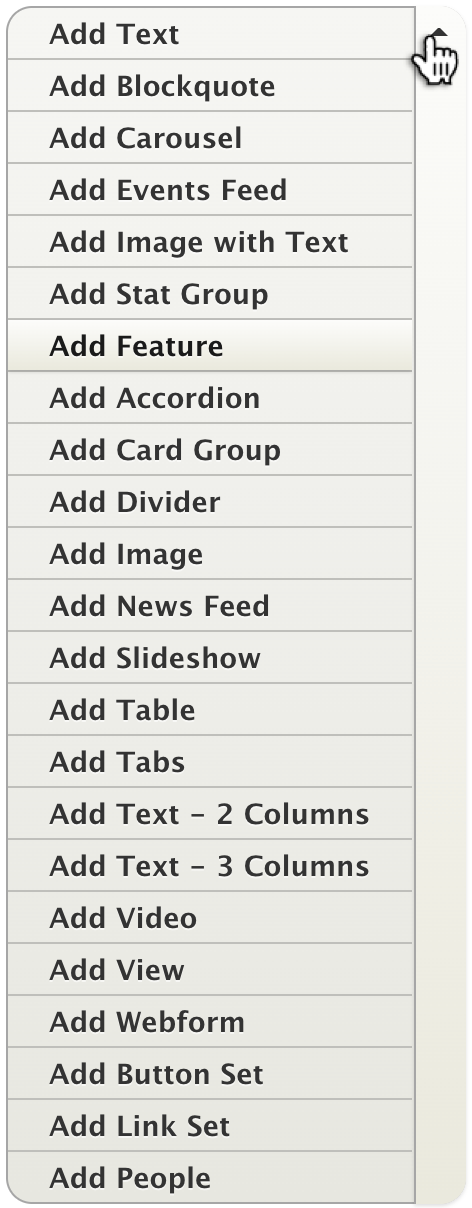
- To add a different type of widget, click the downward pointing triangle (▾), next to the “Add Text” button, to see additional options, ad click the widget you want to add. The new widget is automatically placed at the bottom of the page you are editing. Each widget is described in detail in these guidelines. Examples of each widget are available on the Drupal Demo site for these templates.
- To add a basic text area to your page click the “Add Text” button. The new text widget is automatically added to the bottom of the page you are editing. Visit the Kitchen Sink for a collection of text styles, formatting options, and recommendations.
- Add any desired content to the widget.
- Scroll to the bottom of the page, and click the “Save” button to save your changes.
- Prevent Data Loss: Any widgets you add, or any changes you make to existing widgets are not saved until the entire page is saved. Click the “Save” button at the bottom of the page, to save changes.
Editing an existing widget on a Page
- In order to edit widgets on a page, follow the instructions to start editing an existing page.
- Locate for the particular widget you want to make changes to in the “Sections” area at the bottom of the page you are editing.
- Click the “Edit” Button on the upper right side of that widget to open the available editor options.

- Edit or remove any desired content.
- Scroll to the bottom of the page, and click the “Save” button to save your changes.
- Prevent Data Loss: Any changes you make to existing widgets are not saved until the entire page is saved, by clicking the “Save” button at the bottom of the page.
Available widgets
While each of the 5 layouts offer specific options for adding content to a page, they all have a common set of “widgets” that they take advantage of. A showcase of all these widgets can be seen on the Kitchen Sink page of the Template Demo site.
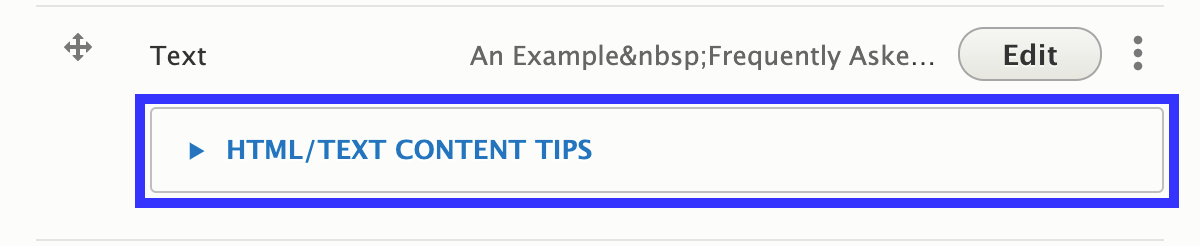
Editing Tips: Each available widget, when added, comes with a “tips” menu that lists requirements or best practices for adding content to that widget.